
—
Introduction – Why Every Modern PC Needs an AIO Cooler
If you’ve ever watched a high‑end gaming rig or a workstation push its CPU to the limit, you’ve probably seen the sleek, glass‑topped radiators humming quietly in the background. That’s an All‑In‑One (AIO) liquid cooler, and it’s quickly becoming the default cooling solution for anyone serious about performance, silence, and aesthetics.
But why are AIO coolers stealing the spotlight from traditional air coolers? The answer lies in three simple facts:
1. Thermal Efficiency – Liquid has a higher heat‑capacity than air, allowing it to move heat away from the CPU faster.
2. Space Management – AIO units free up valuable motherboard real‑estate, making room for taller RAM modules, larger graphics cards, and more aggressive overclocking.
3. Visual Appeal – With RGB lighting, clear tubes, and customizable fans, an AIO cooler can transform a functional build into a work of art.
In this 2,000‑word deep dive, we’ll explore everything you need to know about AIO coolers: from the science behind liquid cooling to the practical steps of picking the right unit, installing it flawlessly, and maintaining it for years of reliable performance. Whether you’re a first‑time builder, a seasoned overclocker, or a PC‑enthusiast looking to upgrade, this guide will equip you with actionable insights to make the best decision for your rig.
—
1. How AIO Coolers Work – The Science Behind the Flow
1.1 The Core Components of an AIO System
An All‑In‑One liquid cooler is essentially a compact, sealed loop that integrates four main parts:
| Component | Role | Typical Specs |
|———–|——|—————|
| Water Block | Directly contacts the CPU’s Integrated Heat Spreader (IHS) and transfers heat to the liquid | Copper base (often nickel‑plated), micro‑fins, mounting hardware |
| Pump | Circulates coolant through the loop, maintaining flow rate | 0.5–1.5 L/min, often integrated into the water block |
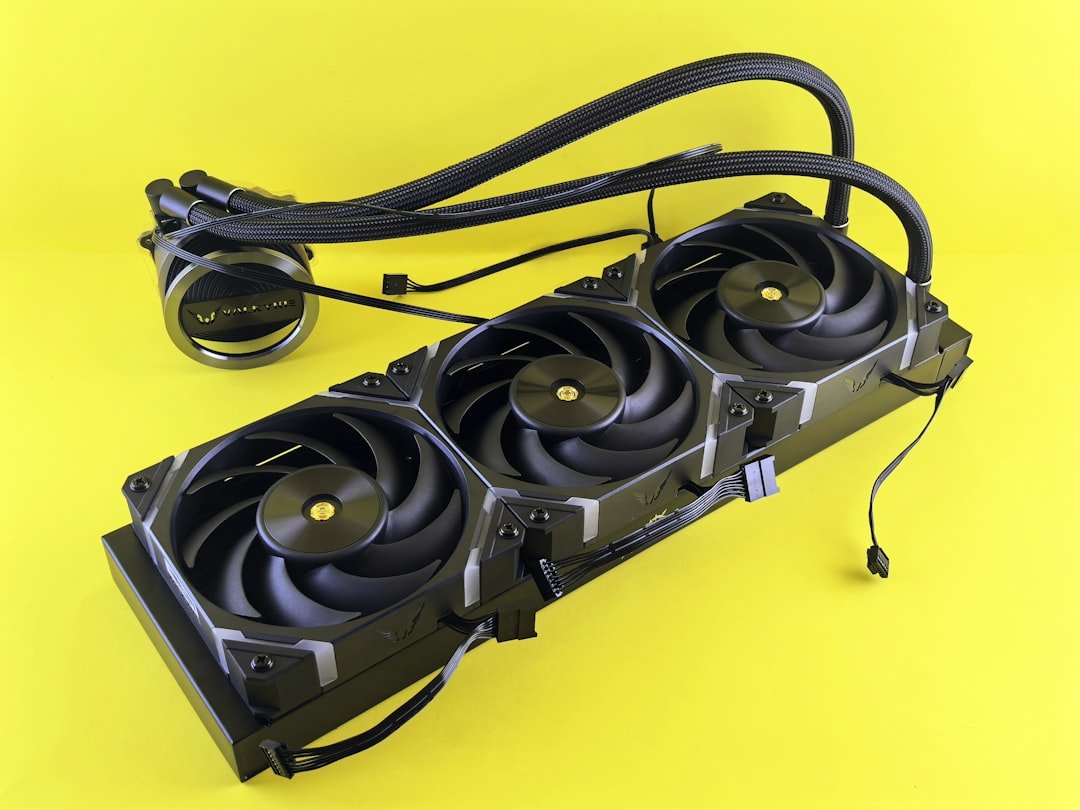
| Radiator | Dissipates heat from the coolant into the surrounding air | 120 mm, 240 mm, 360 mm, or larger; aluminum or copper fins |
| Fans | Pull or push air through the radiator to remove heat | PWM‑controlled, often 1200–2000 RPM, RGB options |
Understanding these components helps you evaluate performance claims. For example, a larger radiator size (e.g., 360 mm) typically offers better thermal headroom than a 120 mm unit, but you must also consider case compatibility and fan airflow.
1.2 Heat Transfer Basics – Why Liquid Beats Air
Heat moves from a hot object to a cooler one via conduction, convection, and radiation. In an AIO cooler:
1. Conduction occurs as the copper water block draws heat away from the CPU’s IHS.
2. Convection happens when the pump pushes the warmed coolant through the radiator, where airflow from the fans carries the heat away.
3. Radiation is minimal but still contributes when the radiator’s surface temperature is high.
Because water’s specific heat capacity (4.18 J/g·°C) is roughly 25× higher than that of air, a small volume of liquid can absorb a large amount of heat before its temperature rises significantly. This efficiency translates into lower CPU temperatures under load, which in turn allows higher boost clocks and longer component lifespan.
1.3 Common Misconceptions – “AIOs Leak!” and “They’re Too Expensive”
- Leakage: Modern AIO coolers are manufactured with sealed, leak‑proof fittings and undergo rigorous pressure testing. While a tiny percentage of units may develop a leak over many years, the risk is comparable to that of a high‑quality air cooler failing mechanically.
- Cost: Yes, AIOs usually cost more than a budget air cooler, but the performance gain—especially for CPUs that run hot (e.g., AMD Ryzen 9 7950X, Intel Core i9‑13900K)—often justifies the expense. Moreover, the price gap has narrowed, with many 240 mm AIOs now under $100.
- Quiet Picks: Corsair iCUE H100i Elite Capellix (pump noise ~22 dB), NZXT Kraken X53 (pump noise ~21 dB).
- Performance Picks: EK‑Quantum Velocity² (high‑flow pump, louder at max but excellent cooling).
- Pump Header: Connect the pump’s power cable to the dedicated CPUFAN or AIOPUMP header on the motherboard. This ensures the pump runs at full speed even when the CPU is idle.
- Fan Headers: Connect the radiator fans to CHAFAN or CPUOPT headers. If your motherboard supports PWM control on these headers, you’ll gain dynamic fan curves for silence and performance.
- Leak Test: Before installing the GPU or heavy components, run a stress test (e.g., Prime95, AIDA64) for 10‑15 minutes while monitoring for any coolant droplets around the pump or tubing.
- Temperature Check: Use software like HWMonitor, Core Temp, or the cooler’s own UI (iCUE, CAM) to confirm CPU temps are within expected ranges (e.g., <70 °C under load for a 240 mm AIO on a Ryzen 7 7700X).
—
2. Choosing the Right AIO Cooler – Factors to Consider
2.1 Radiator Size and Case Compatibility
The most visible spec on an AIO cooler is its radiator length:
| Radiator Size | Typical Fan Count | Ideal Use‑Case | Approx. Thickness |
|—————|——————-|—————-|——————-|
| 120 mm | 1 fan | Small form factor (SFF) builds, HTPCs | 30 mm |
| 240 mm | 2 fans | Mid‑tower cases, moderate overclocking | 30–35 mm |
| 360 mm | 3 fans | High‑performance gaming rigs, heavy overclocking | 30–38 mm |
| 480 mm+ | 4+ fans | Enthusiast water‑loop hybrids, workstation builds | 30–45 mm |
Actionable tip: Before you buy, measure the maximum radiator length your case supports—both in terms of mounting orientation (front, top, rear) and clearance for other components (RAM, GPU). Many manufacturers publish a “compatibility list” that includes popular case models; use it as a quick reference.
2.2 Pump Performance and Noise Levels
Pump speed is measured in RPM and flow rate (L/min). Higher RPMs mean more coolant movement but also more audible whine. Look for units that offer PWM control so the pump can spin down when the CPU is idle, reducing noise to near‑silence.
Actionable tip: Check reviews that include decibel (dB) measurements at idle and load. If you’re building a silent workstation, aim for <25 dB at idle.
2‑3. Coolant Composition and Longevity
Most AIOs ship with a pre‑filled mixture of distilled water, glycol, and corrosion inhibitors. This formulation prevents algae growth and protects metal components. Some premium models (e.g., Thermaltake Floe Riing) allow you to refill the loop with aftermarket coolant for color customization.
Actionable tip: If you plan to keep the cooler for 5+ years, choose a brand that offers refill kits or a warranty covering pump failure. Regularly inspect the tube for cloudiness—if it appears milky, a refill may be necessary.
2‑4. Aesthetic Features – RGB, Tubing, and Branding
While performance should be the primary driver, aesthetics matter for many builders. Modern AIOs come with addressable RGB lighting on the pump head, fans, or even the tubing. Brands like Corsair, NZXT, and ASUS ROG provide software integration (iCUE, CAM, Aura Sync) for synchronized lighting across the entire system.
Actionable tip: If you already use a specific RGB ecosystem, prioritize an AIO that’s compatible. This reduces the need for extra control hubs and keeps your lighting setup cohesive.
2‑5. Budget vs. Premium – Getting the Most Bang for Your Buck
| Budget ( $130) |
|—————|———————-|——————-|
| 120 mm or 240 mm basic models (e.g., Cooler Master MasterLiquid ML240L) | 240 mm with RGB and higher‑quality pump (e.g., Corsair H115i) | 360 mm or larger, premium pump, custom coolant (e.g., EK‑Quantum Velocity) |
| Limited fan speed control, basic mounting | PWM fans, quieter pump, better fin density | Advanced fan curves, low‑noise pump, higher fin density, longer warranty |
Actionable tip: For most gamers, a 240 mm AIO in the $90‑$120 range offers a sweet spot—excellent cooling, decent aesthetics, and a warranty that covers most failures.
—
3. Step‑by‑Step Installation Guide – From Box to Bench
Installing an AIO cooler may look intimidating, but with the right preparation it can be completed in 30‑45 minutes. Below is a detailed, actionable checklist that works for the majority of modern motherboards and cases.
3‑1. Gather Tools & Prepare Your Workspace
| Item | Reason |
|——|——–|
| Phillips #2 screwdriver | Securing brackets & fans |
| Thermal paste (if not pre‑applied) | Ensures optimal heat transfer |
| Isopropyl alcohol (70%+) & lint‑free cloth | Cleans CPU surface |
| Zip ties or Velcro straps | Cable management |
| Motherboard manual | Confirms socket compatibility |
Pro Tip: Lay out the AIO components on a clean, static‑free surface. Verify that the water block’s mounting bracket matches your CPU socket (e.g., LGA 1700, AM5).
3‑2. Remove Existing Cooling Solution
1. Power down the PC, unplug the cord, and disconnect all peripherals.
2. Unscrew and carefully lift the current cooler, keeping an eye on any attached fan cables.
3. Clean the CPU’s IHS with isopropyl alcohol to remove old thermal paste residue.
3‑3. Mount the Radiator & Fans
1. Decide on placement: Front‑mount for intake (cooler air) or top‑mount for exhaust. Front‑mount generally yields lower CPU temps, while top‑mount can improve overall case airflow.
2. Attach fans to the radiator: Most AIOs ship with fans pre‑installed, but if not, use the provided screws (typically 4 mm). Align the fan’s airflow direction (arrow on the fan frame) according to your chosen mounting orientation.
3. Secure the radiator: Use the case’s mounting points (usually 120 mm or 140 mm holes) and the supplied screws. Ensure the radiator sits flush without wobbling.
3‑4. Install the Water Block on the CPU
1. Apply thermal paste (if not pre‑applied): Place a pea‑size dot in the center of the CPU.
2. Position the water block: Align the mounting holes with the bracket, then lower the block onto the CPU.
3. Secure the block: Tighten the screws in a diagonal pattern to ensure even pressure. Most kits provide a torque‑spec (e.g., 6 Nm); a screwdriver with a torque setting is ideal but not mandatory.
3‑5. Connect Pump and Fans to Power
3‑6. BIOS/UEFI Configuration
1. Enter BIOS after the first boot.
2. Locate the Fan Control or Hardware Monitor section.
3. Set the pump header to Full Speed (or “PWM 100%”) to avoid pump throttling.
4. Create a fan curve for the radiator fans: start at ~30 % PWM at 30 °C, ramp up to 100 % at 80 °C.
5. Save and exit.
3‑7. Test for Leaks & Verify Temperatures
Pro Tip: If you notice a faint “hissing” sound from the pump, it’s usually normal pump startup noise. Persistent grinding or irregular spikes in temperature may indicate a faulty pump or inadequate mounting pressure.
—
4. Maintaining Your AIO Cooler – Keep It Cool for Years
Even though AIOs are sealed, they still benefit from periodic maintenance to sustain peak performance and avoid premature failure.